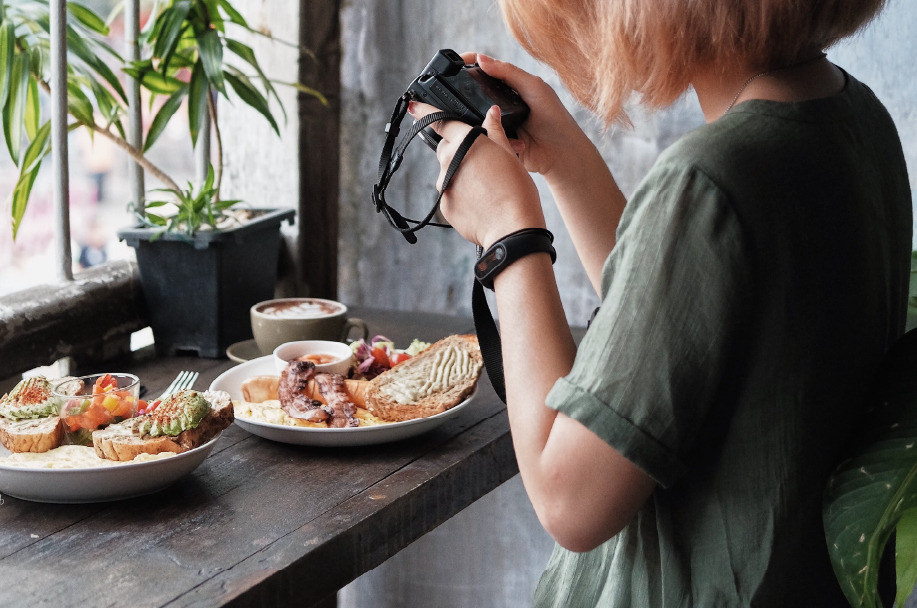
Did you know that menu items with photos are twice as likely to be ordered? With online ordering growing 300% faster than in-house dining, having mouthwatering photos is essential to driving more transactions through your menu.
Ready to create a craveable menu but not sure where to start? One of the keys to a great food photo is great food styling! That’s right, even food needs a little TLC before a camera close-up. So, what are the best tips to making your food photo-ready?
First off, it’s important to note that photography and food styling are different skillsets. No one knows your food quite like you do, and if you’re working with a photographer, it’s important to collaborate and chat about the shoot beforehand!
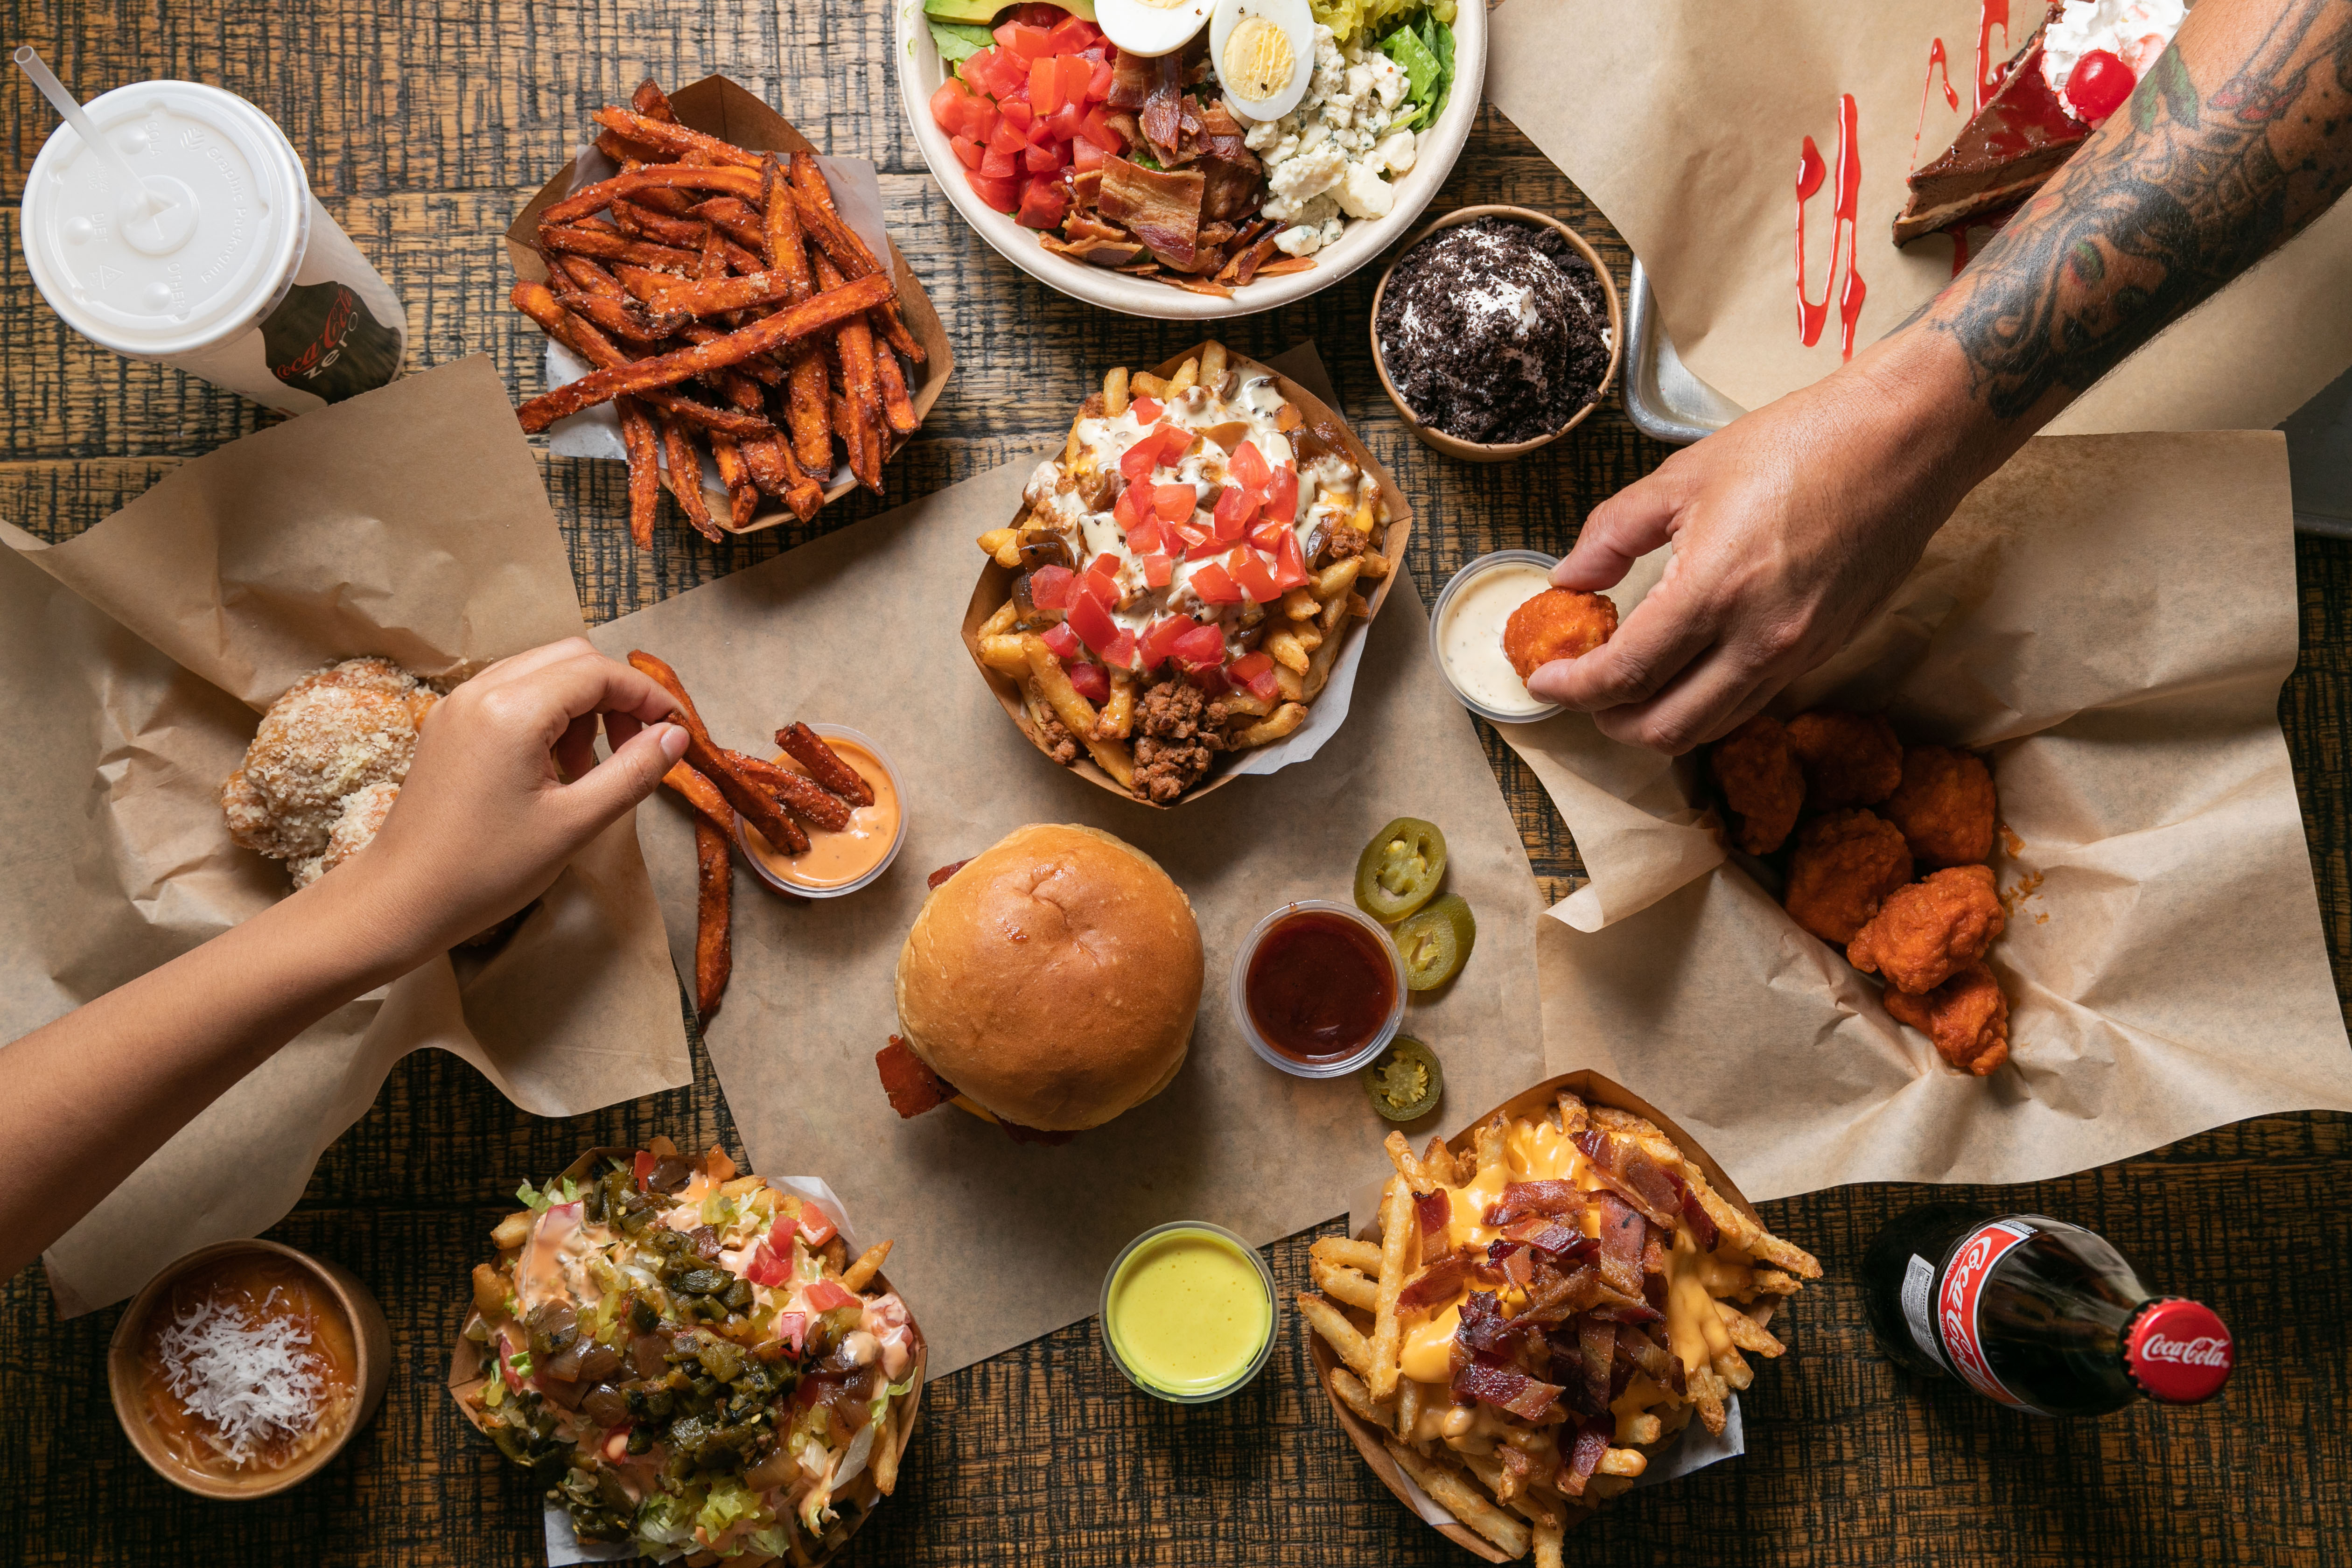 photo credit: Sarah King
The Basics
Food should be prepped and cooked solely for the shoot! Food in front of the camera will be styled, handled, left to sit out, and certainly not at a quality you’d want to serve to a customer!
Have the camera set up and scene ready to go before the food is ready. Restaurants move fast, but the same can’t be said for photography. You’ll want to make sure everything is ready to go without hiccups the moment you set the plate down. Time your dishes accordingly so that they’re not sitting out while you’re trying to get the camera set up.
Fresh food is the key ingredient! Pick the nicer-looking items that will best show off your dish. Have extra on hand because some foods may “die” after sitting for a short period of time (I’m looking at you, guacamole). It’s also great to have more than you need in case you want to fill out a plate fully for more even more appealing food photos.
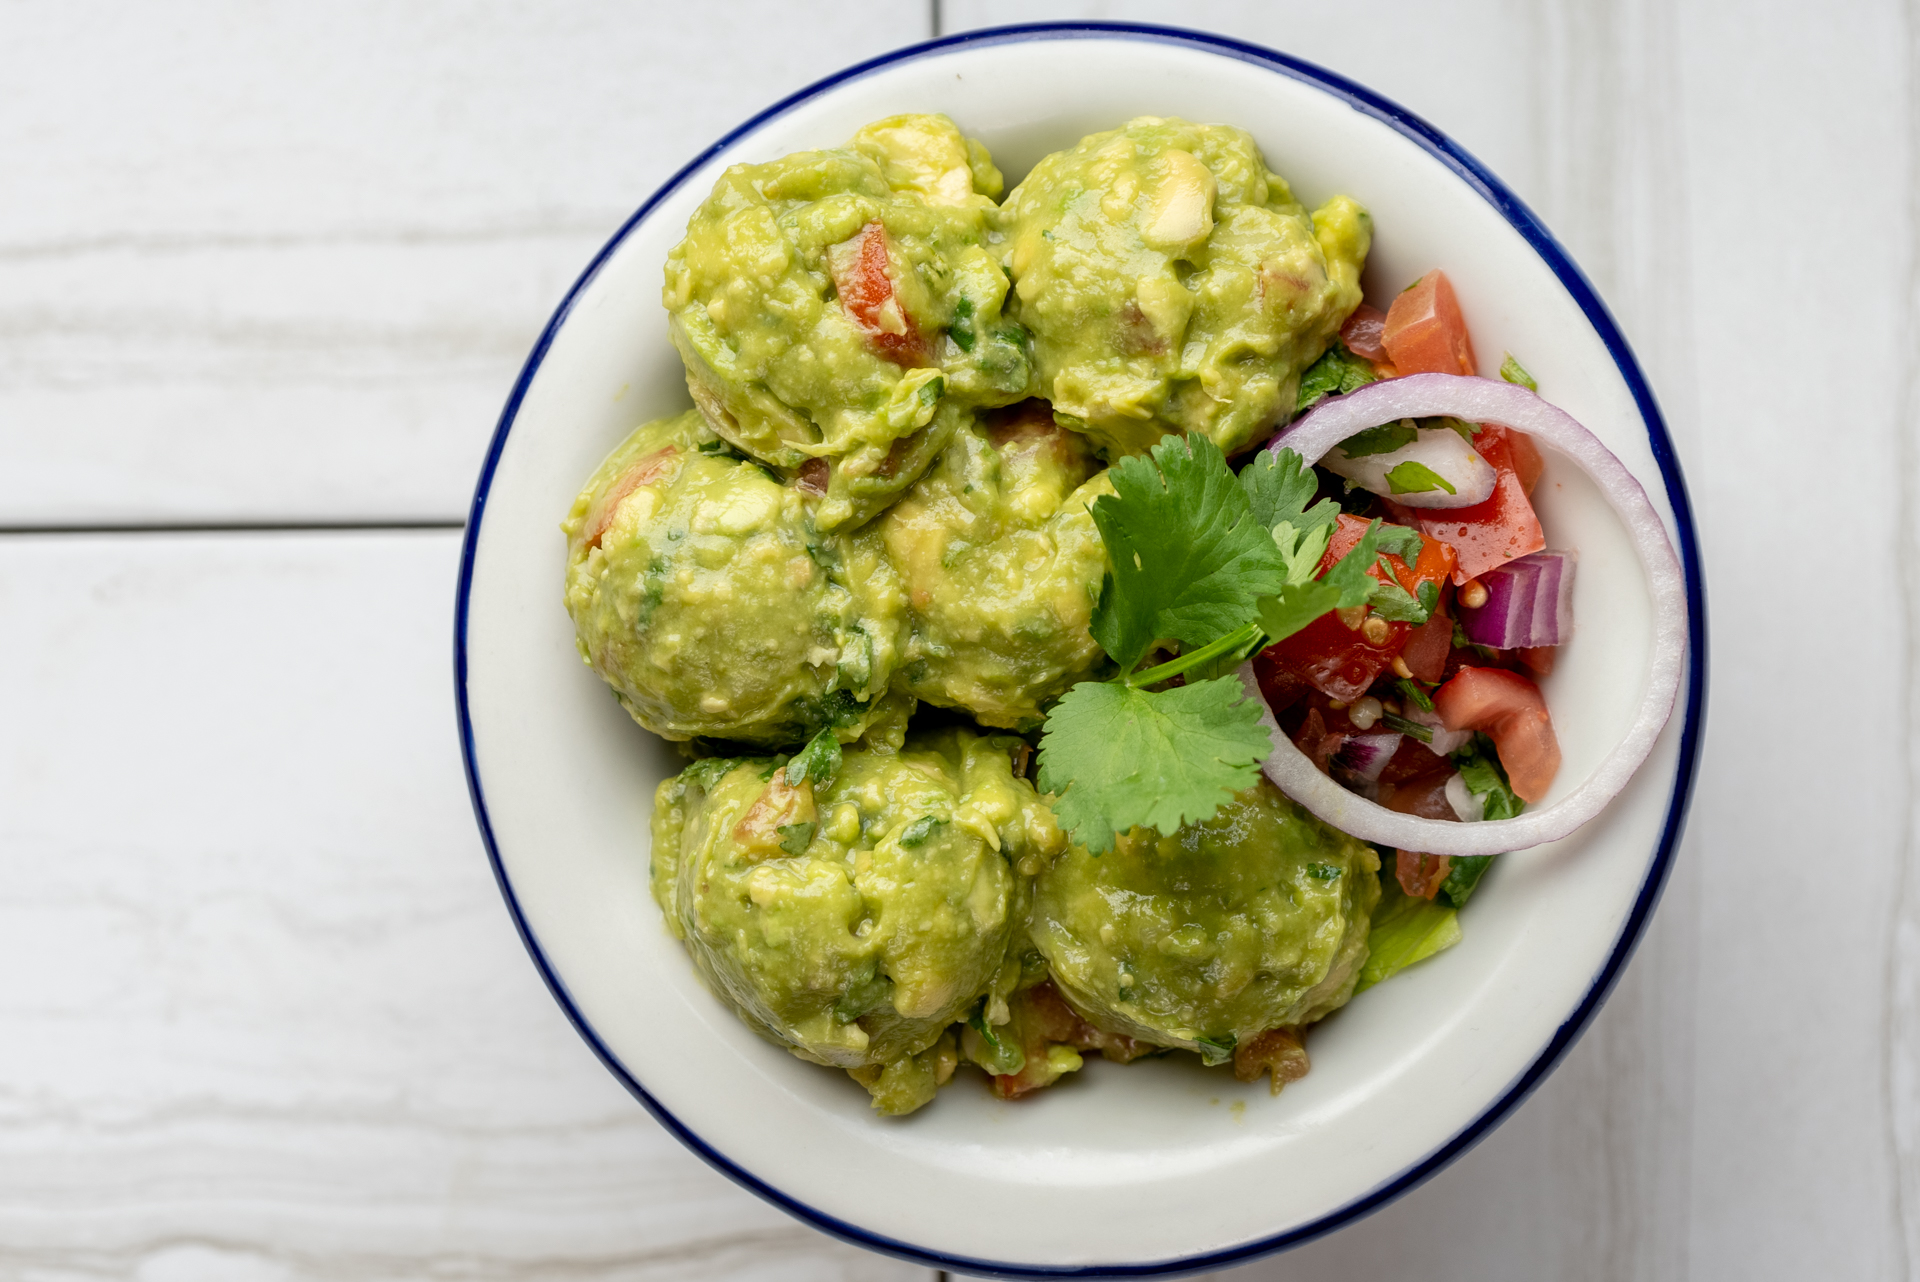 photo credit: Alex Wu
Undercook
Once cooked, food loses some of its color and texture. Believe it or not, most of the food you see from professionally styled photos probably isn’t safe to eat. Meats begin to turn brown and dry out after being cooked and left in front of a camera. Veggies and fruits wilt and shrink.
Give your vegetables a quick ice bath before shooting to keep their color. Pick underripe fruits and veggies that will hold their shape better and last longer in front of a camera. Undercook your meats to keep that juicy color and have a bit of olive oil nearby to brush on to keep that mouth-watering look to your meats as they sit in front of the camera!
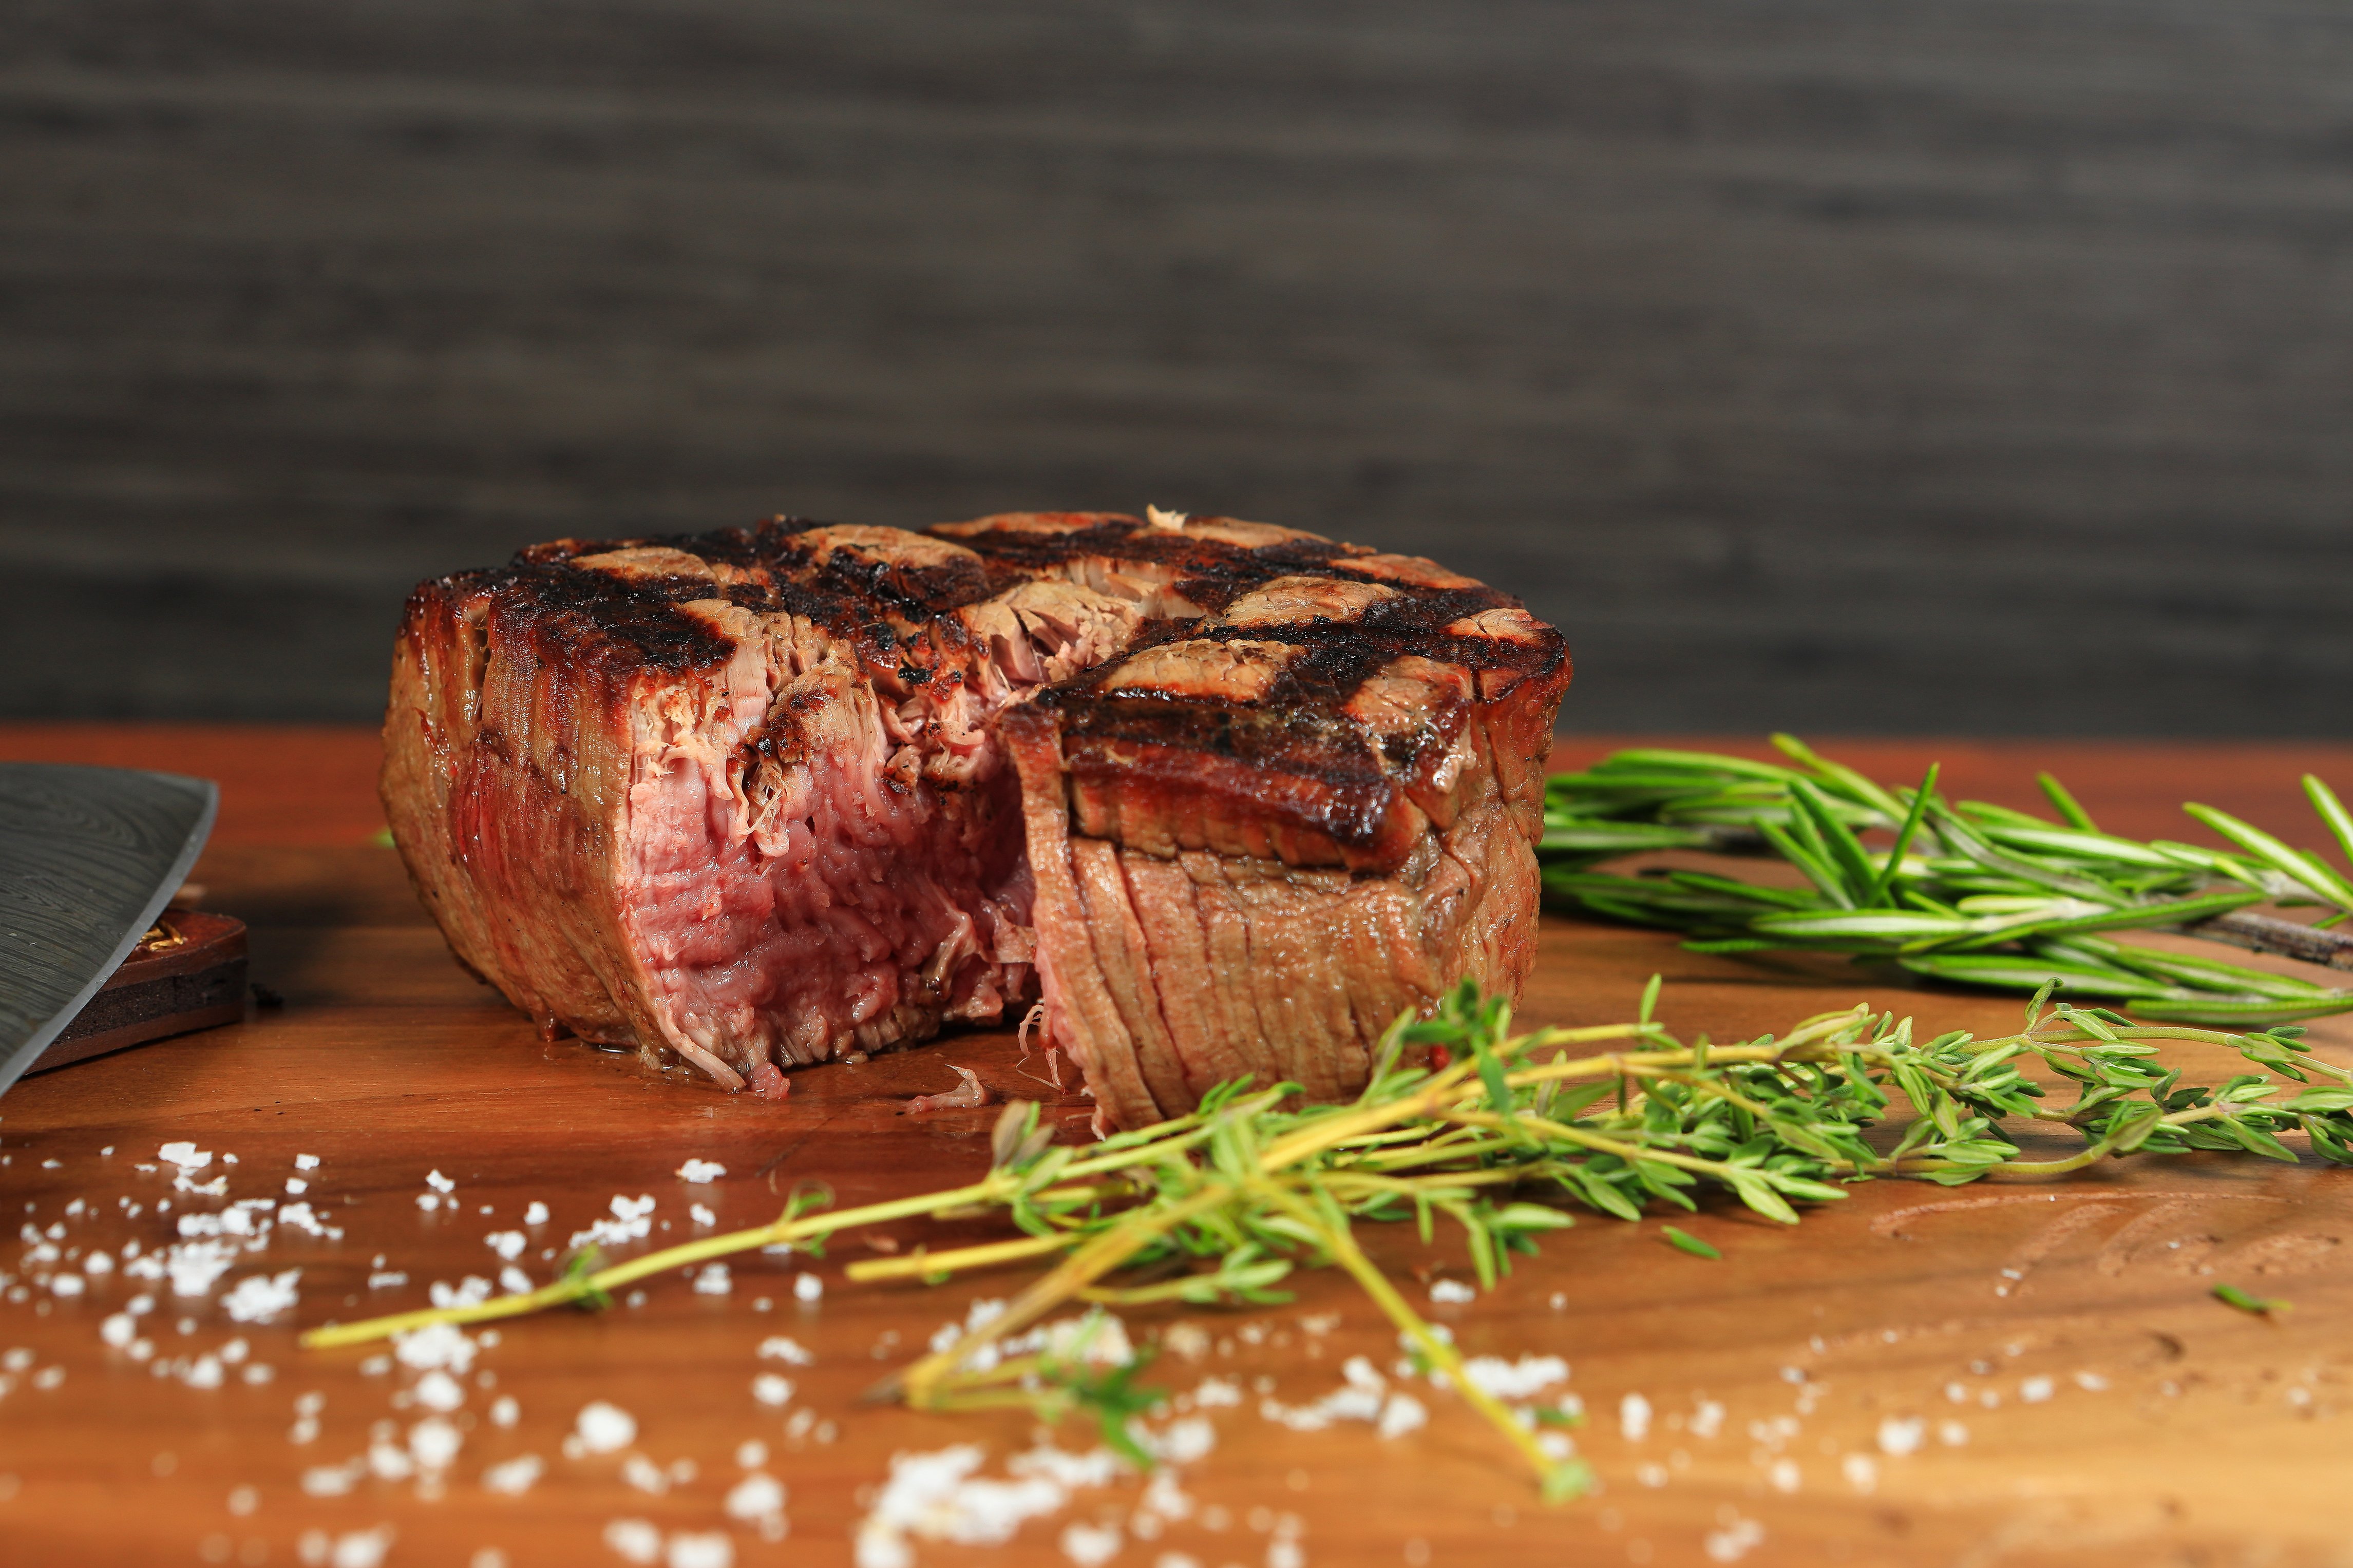 photo credit: Tim Mahaven
Underdress
Always add sauces and dressings last! Salads will begin to wilt from the acidity of a dressing. Sauces will begin to coagulate, and you’ll see residue buildup along the edges of a plate or ramekin. Keep it minimal, we want to see what you’re serving up underneath it all.
Thickening your sauce can go a long way. This will help keep it from running and adds a greater presence to the sauce without dousing your food in it. Now is a great opportunity to get creative! Maybe drizzle some around the plate or keep some off to the side in a cool looking little dish. Adding these extra elements can be simple and eye-catching!
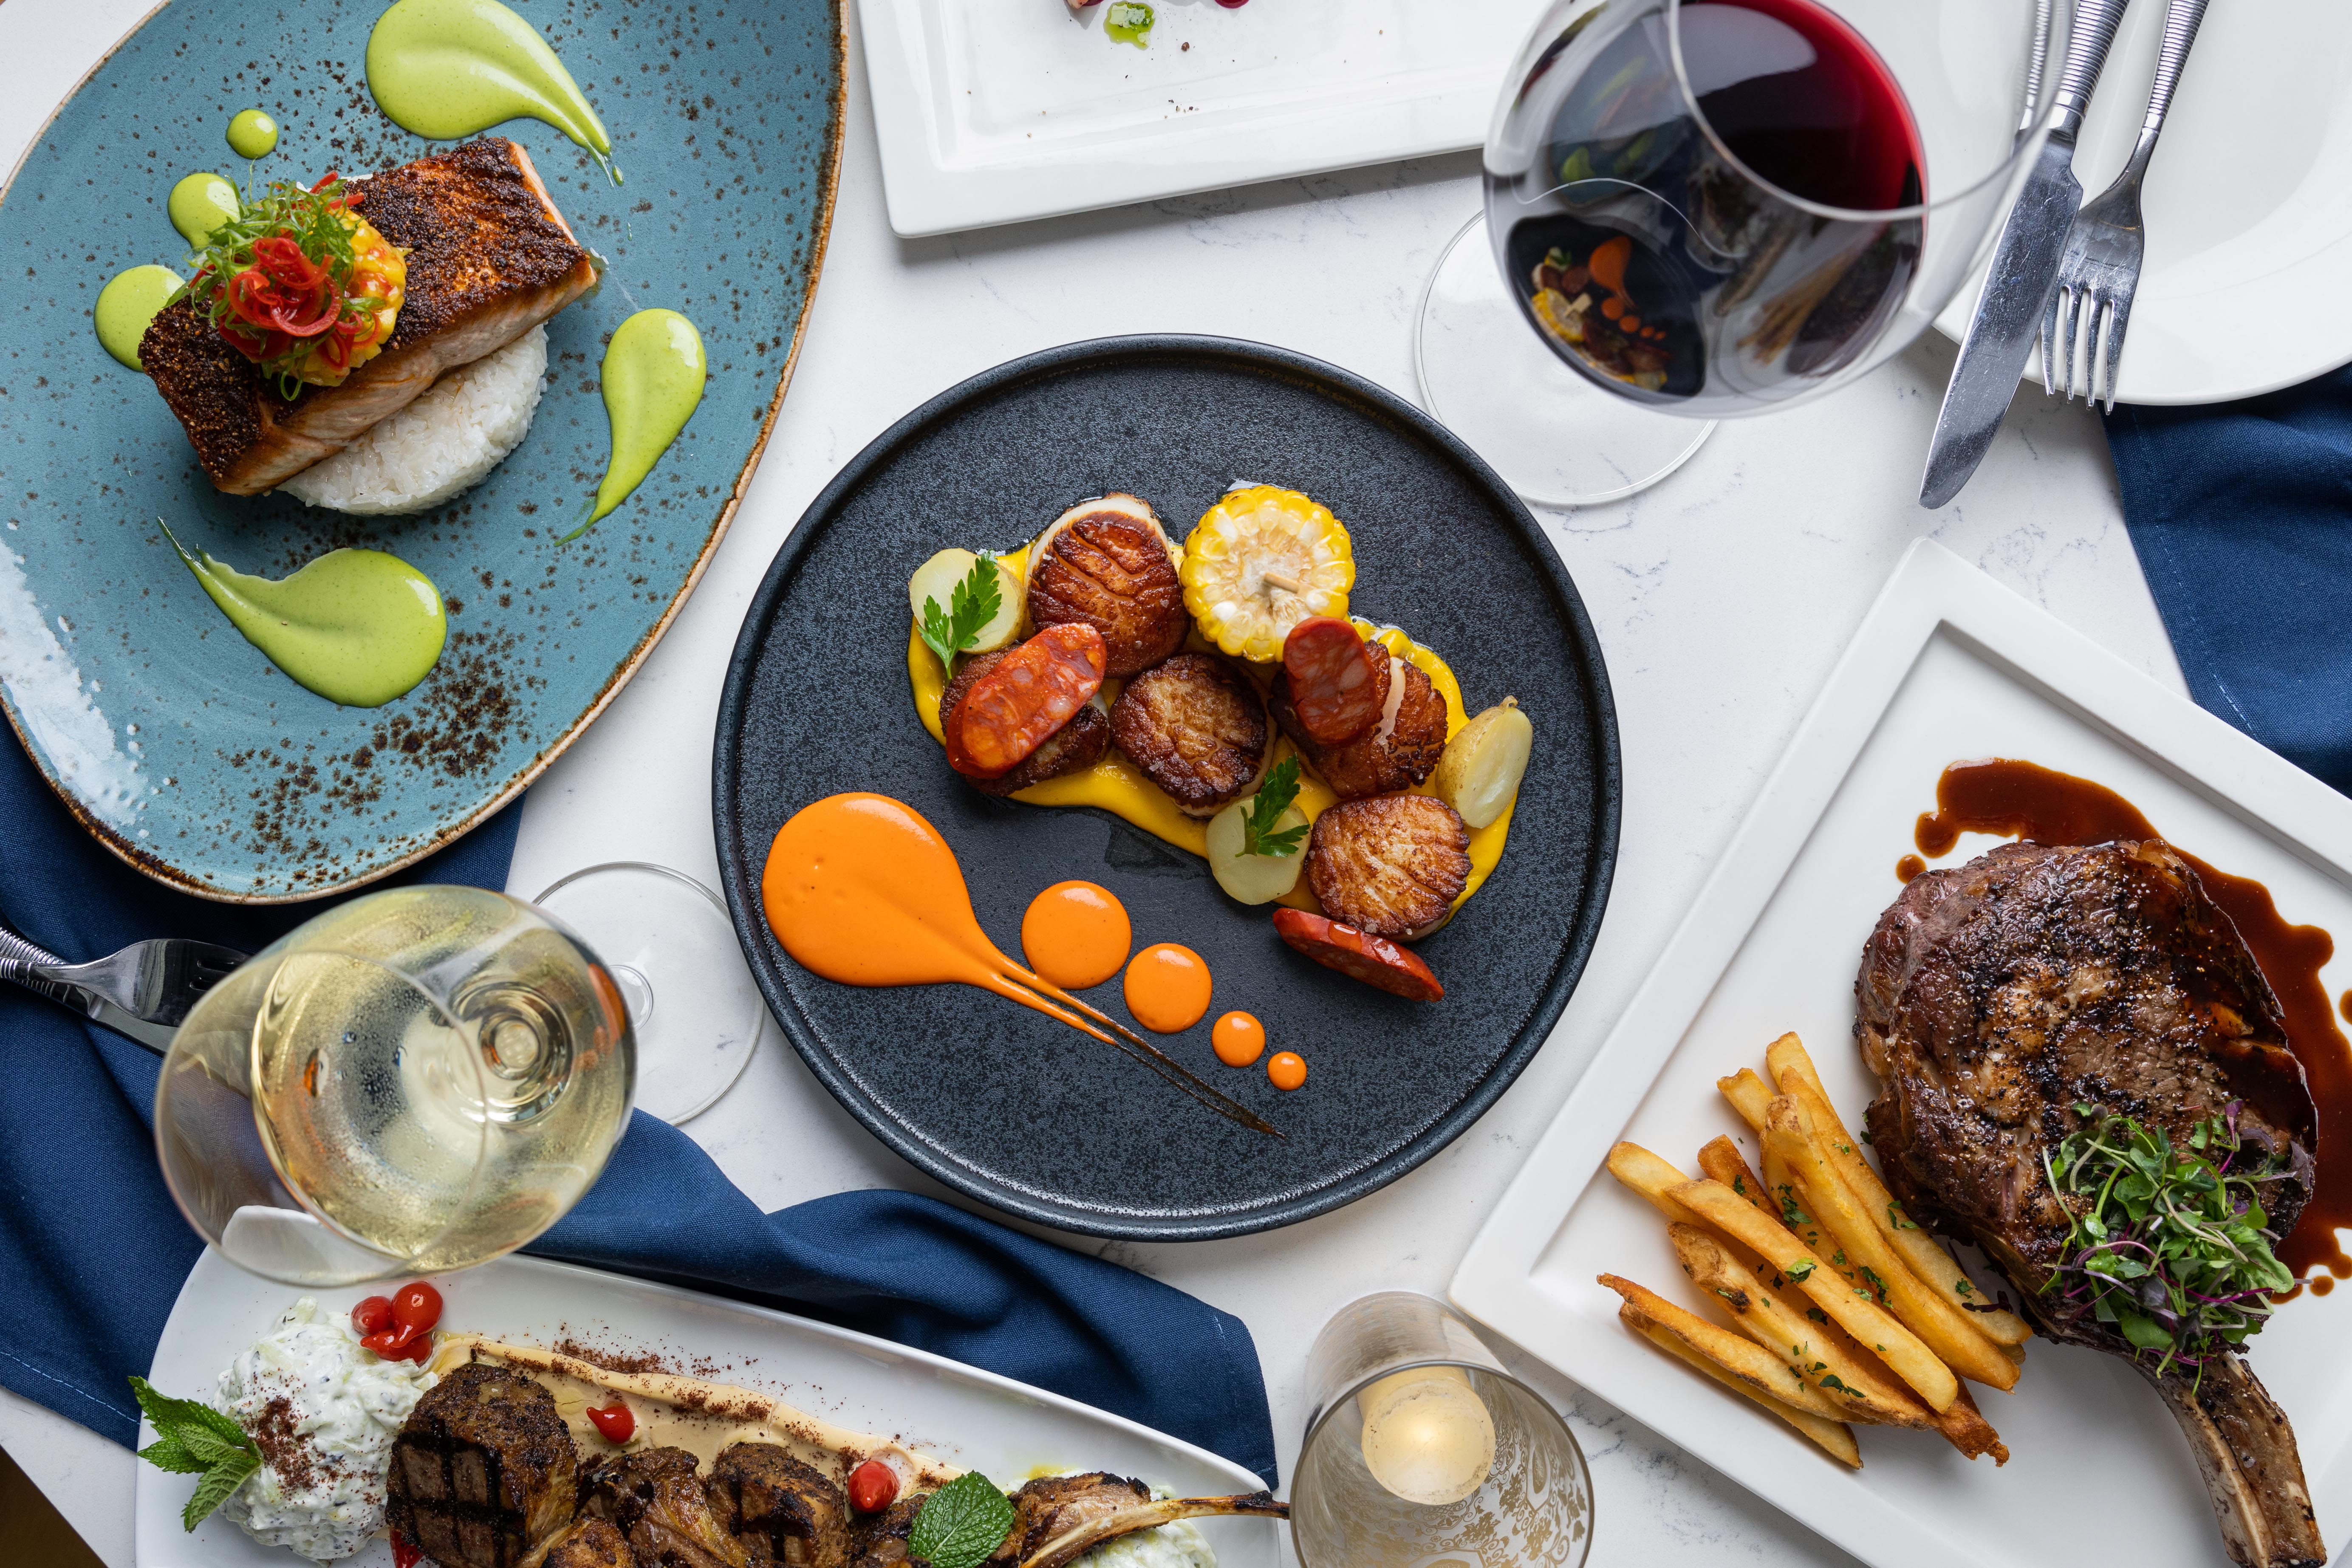 photo credit: Sarah King
Garnishes
Adding garnish to your dish is the small detail that adds the magic in most food photos. Pick a garnish that adds contrast to your food but makes sense with what you’re serving. A sprig of rosemary next to a steak can work wonders. A dash of salt across a cutting board also adds a dash of interest.
Try to contrast colors and darks against lights. Always make sure your garnish is either an ingredient or something you would serve with your dish. They should add a simple touch without leaving the viewer wondering why you’re using it. Sprinkle some of it around the plate and the table to get creative and keep people looking.
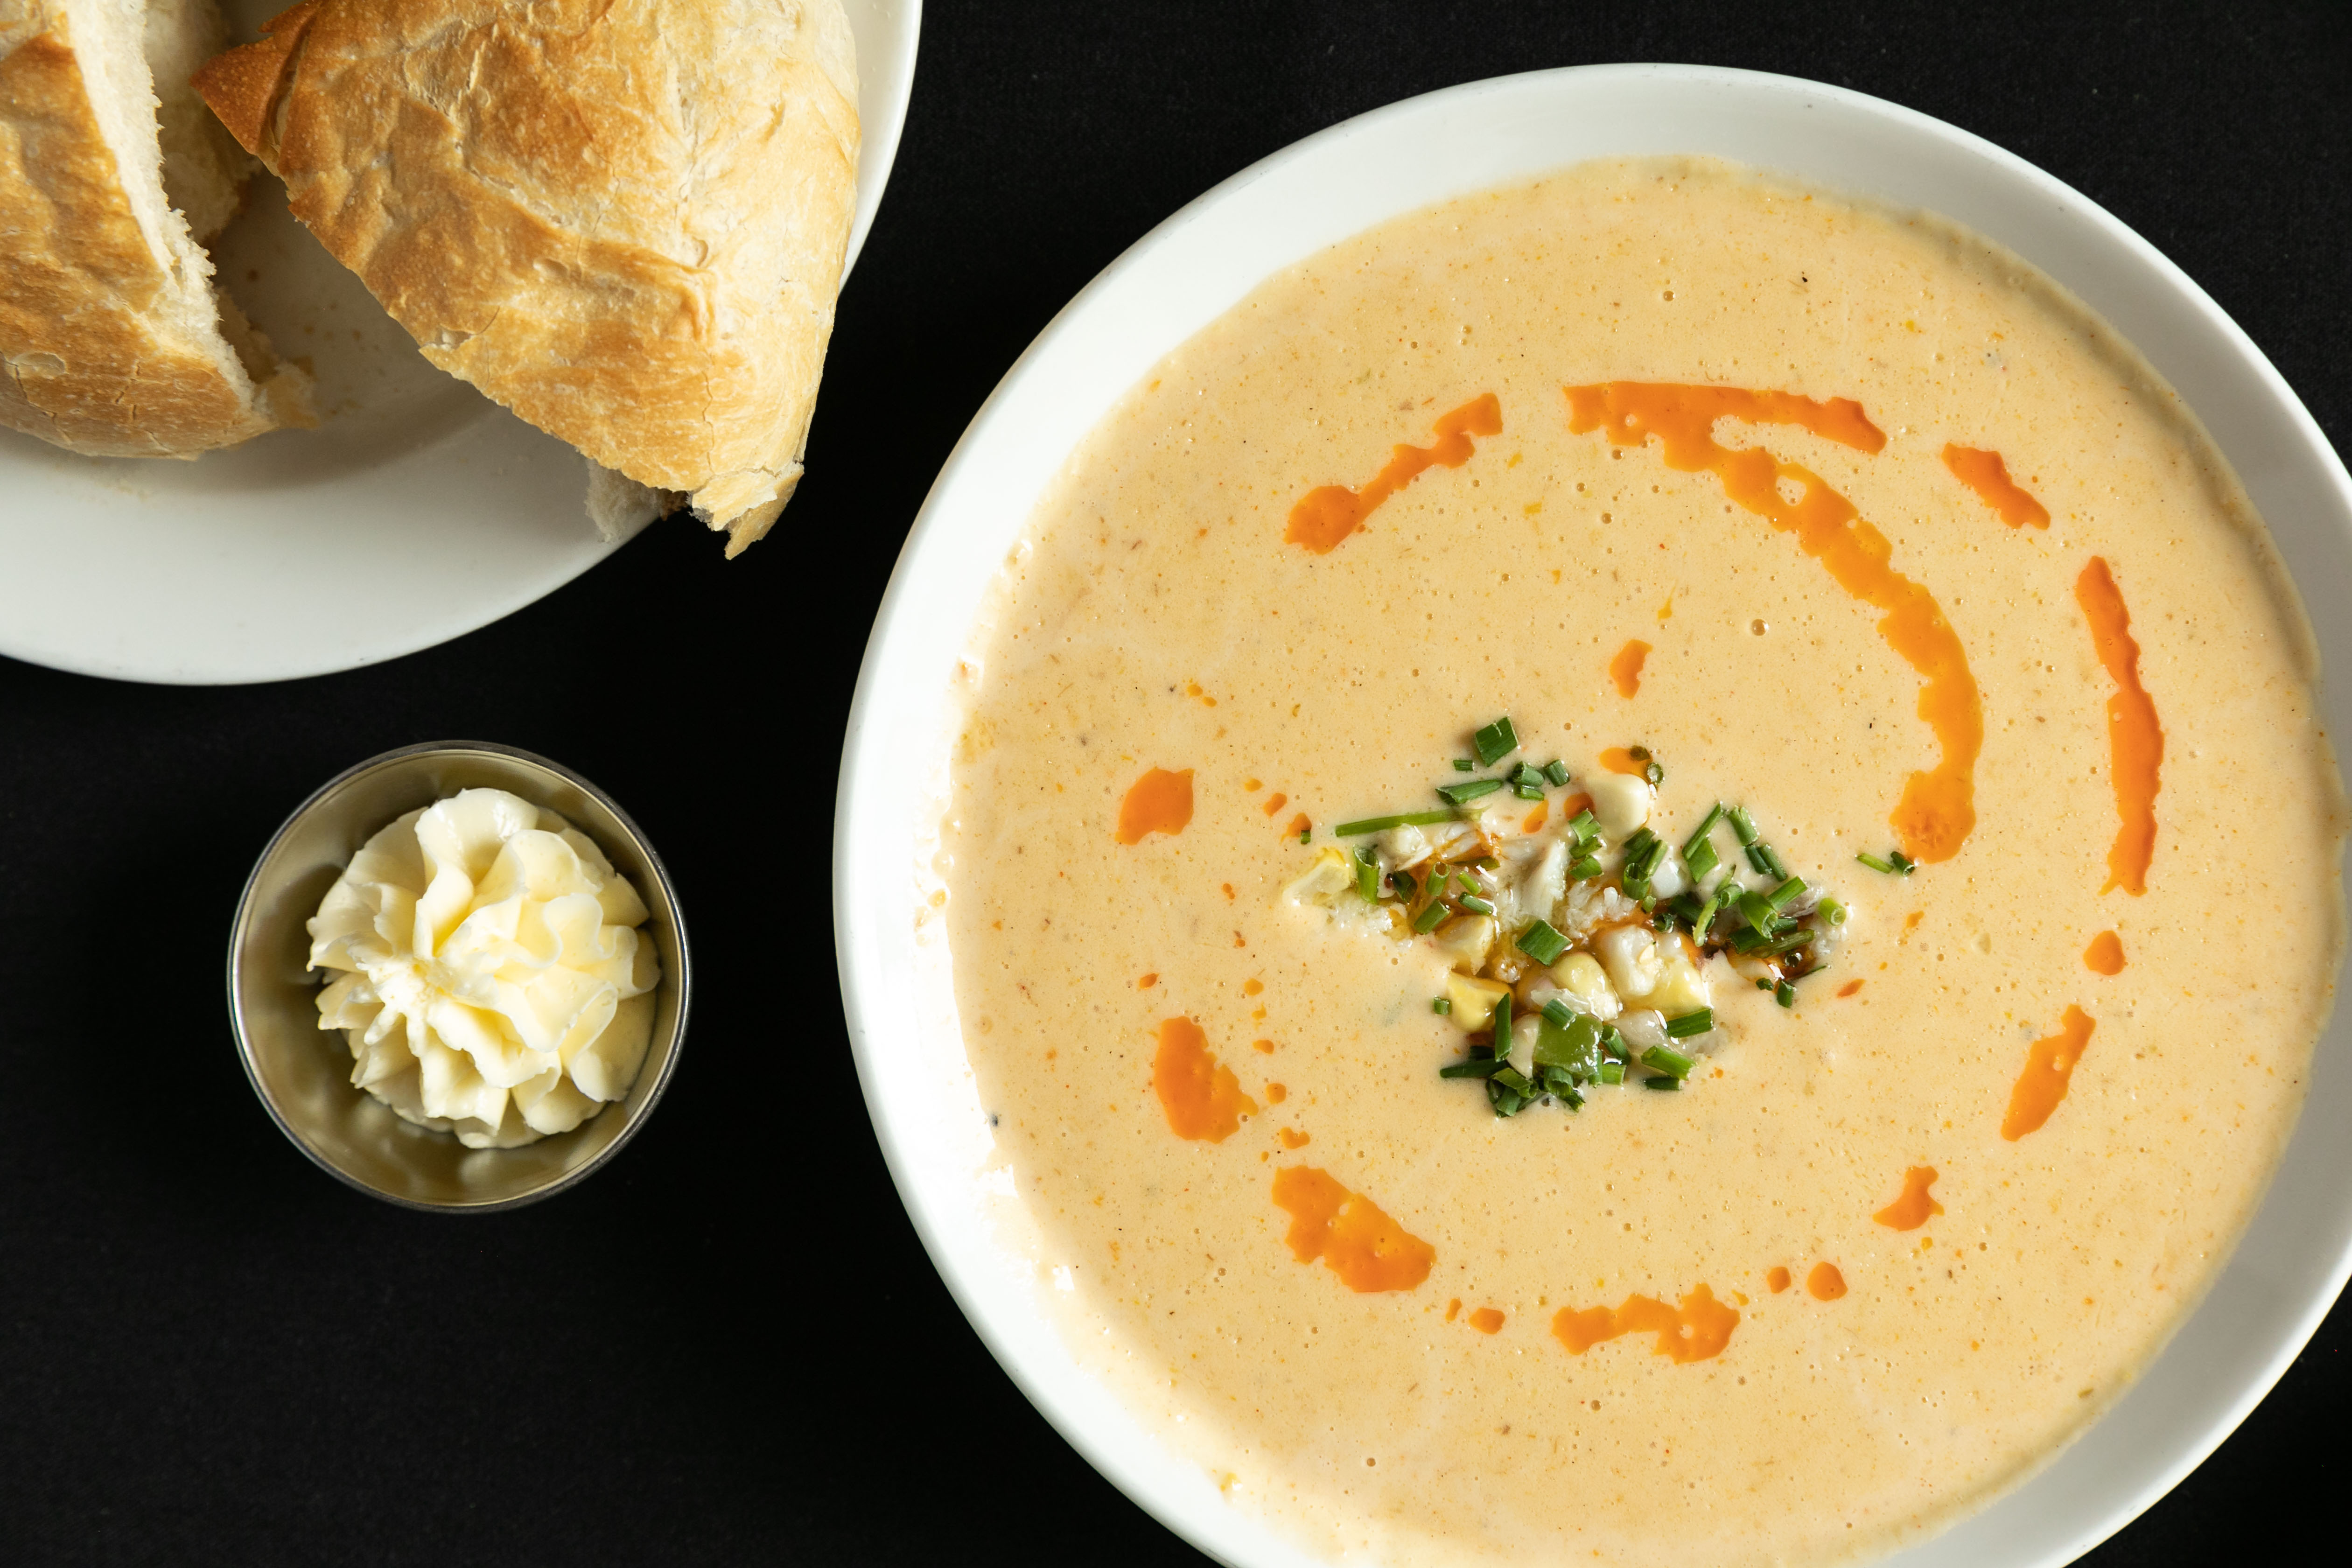 photo credit: Ashley Elwell
Plating
Let’s talk about plating your dishes. Think of plating as your canvas. We know what we need to make the food look its best, but what about the background — the canvas?
We may think that large plates look cool when you’re about to dive in to eating your food. With photography, it can be quite the opposite. A large plate can make your food seem sparse. In this case, smaller may be better! Fill out your plates with food — after all, food is the focus of your shoot.
Keep our attention on the photo by breaking up the symmetry with different shapes. Introduce some napkins, utensils, or have a cutting board in the corner of the shot. Now you’re adding some interest, and we can even say there’s a bit of a story behind the photo. What pairs better than great food and a delicious story?
 photo credit: Matt Gendal
Tips and Tricks
Now that you’ve got the basics covered, here are a few quick tips to help put your best food forward!
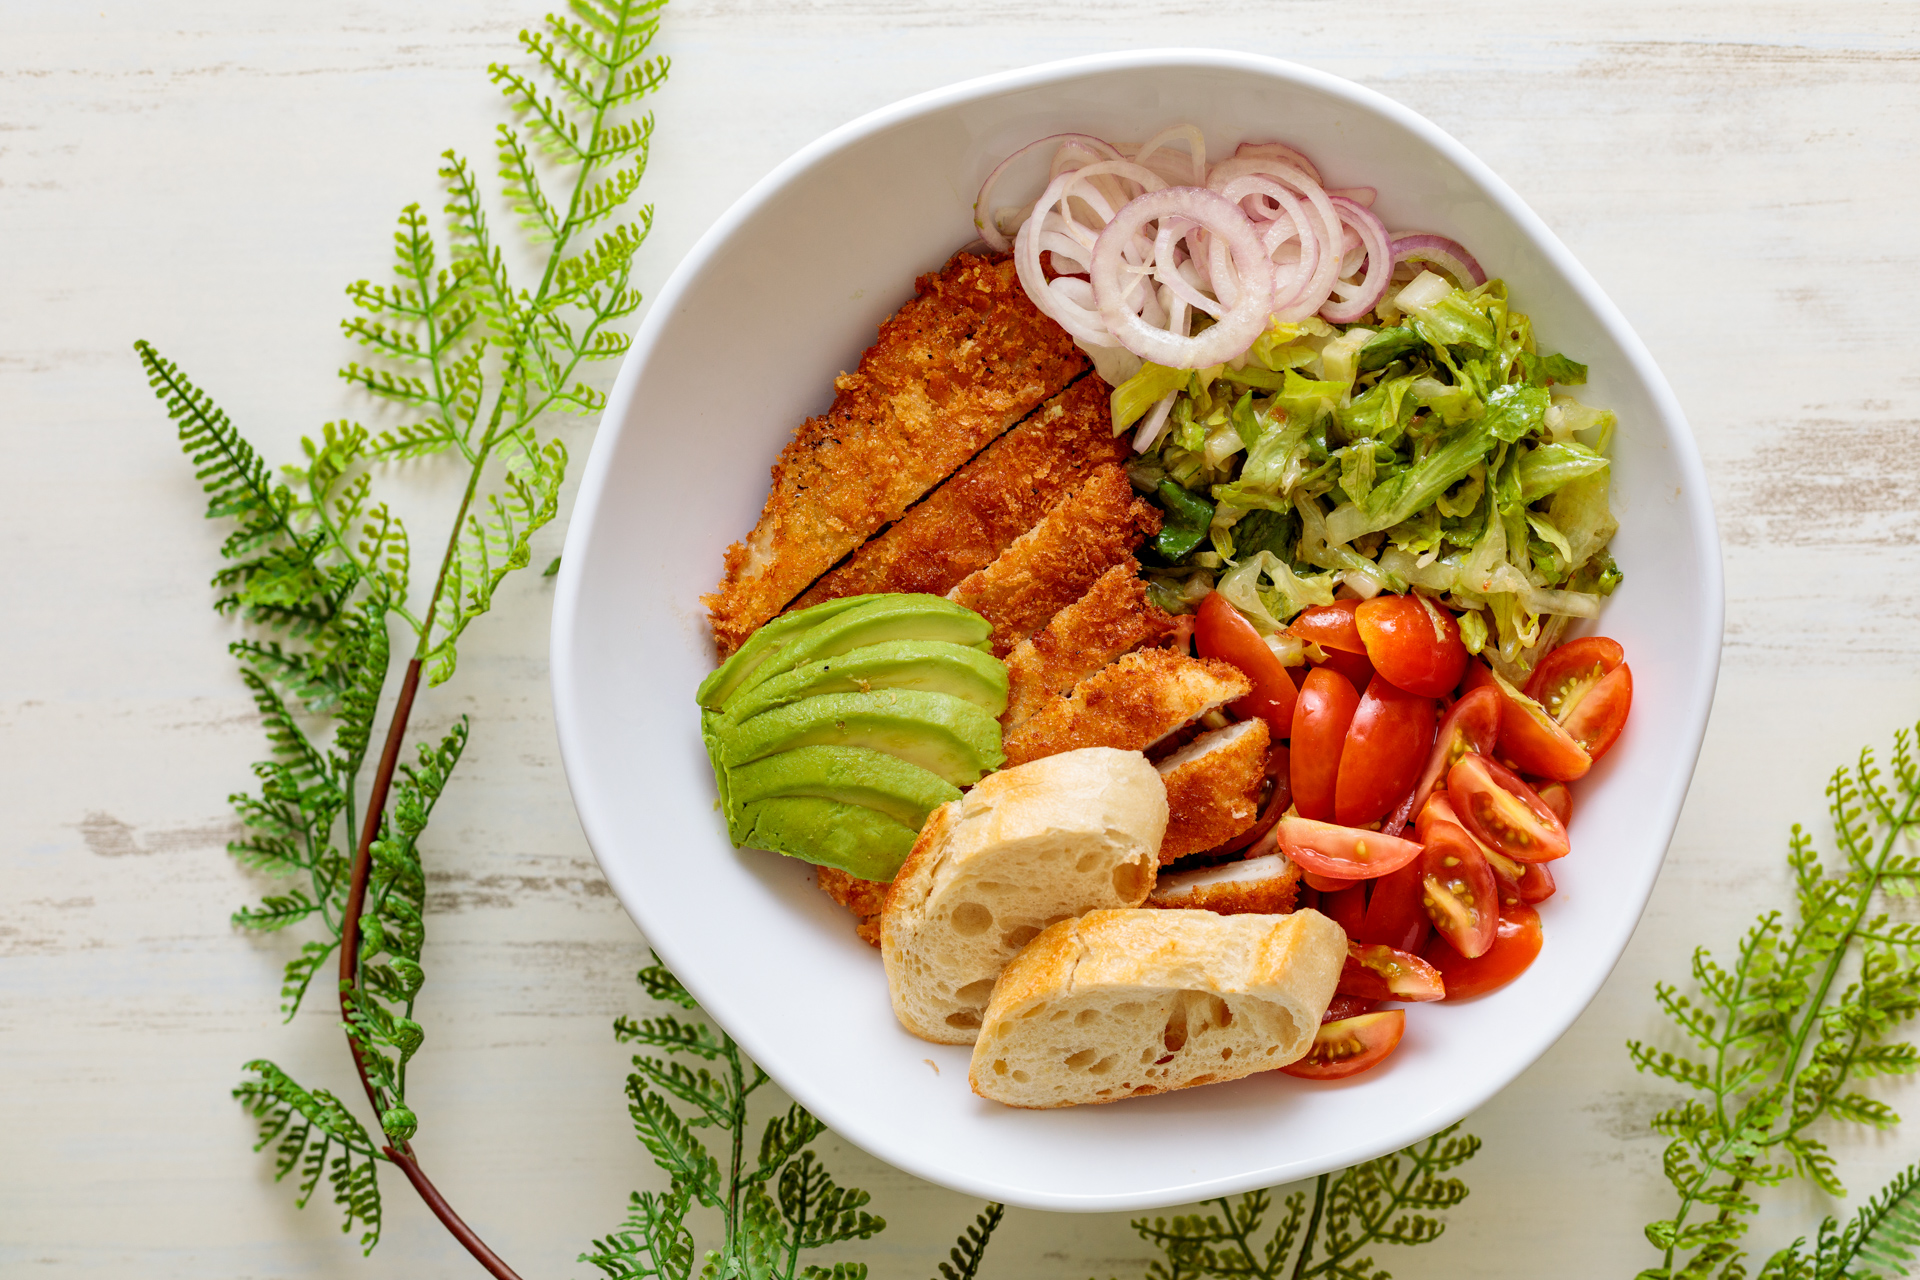
Show Your Ingredients
The star of your food is exactly that — your food! If you’ve got burger or a burrito, show off the ingredients! Layer it or cut in a way that shows your customers what they’re getting and how yummy it looks.
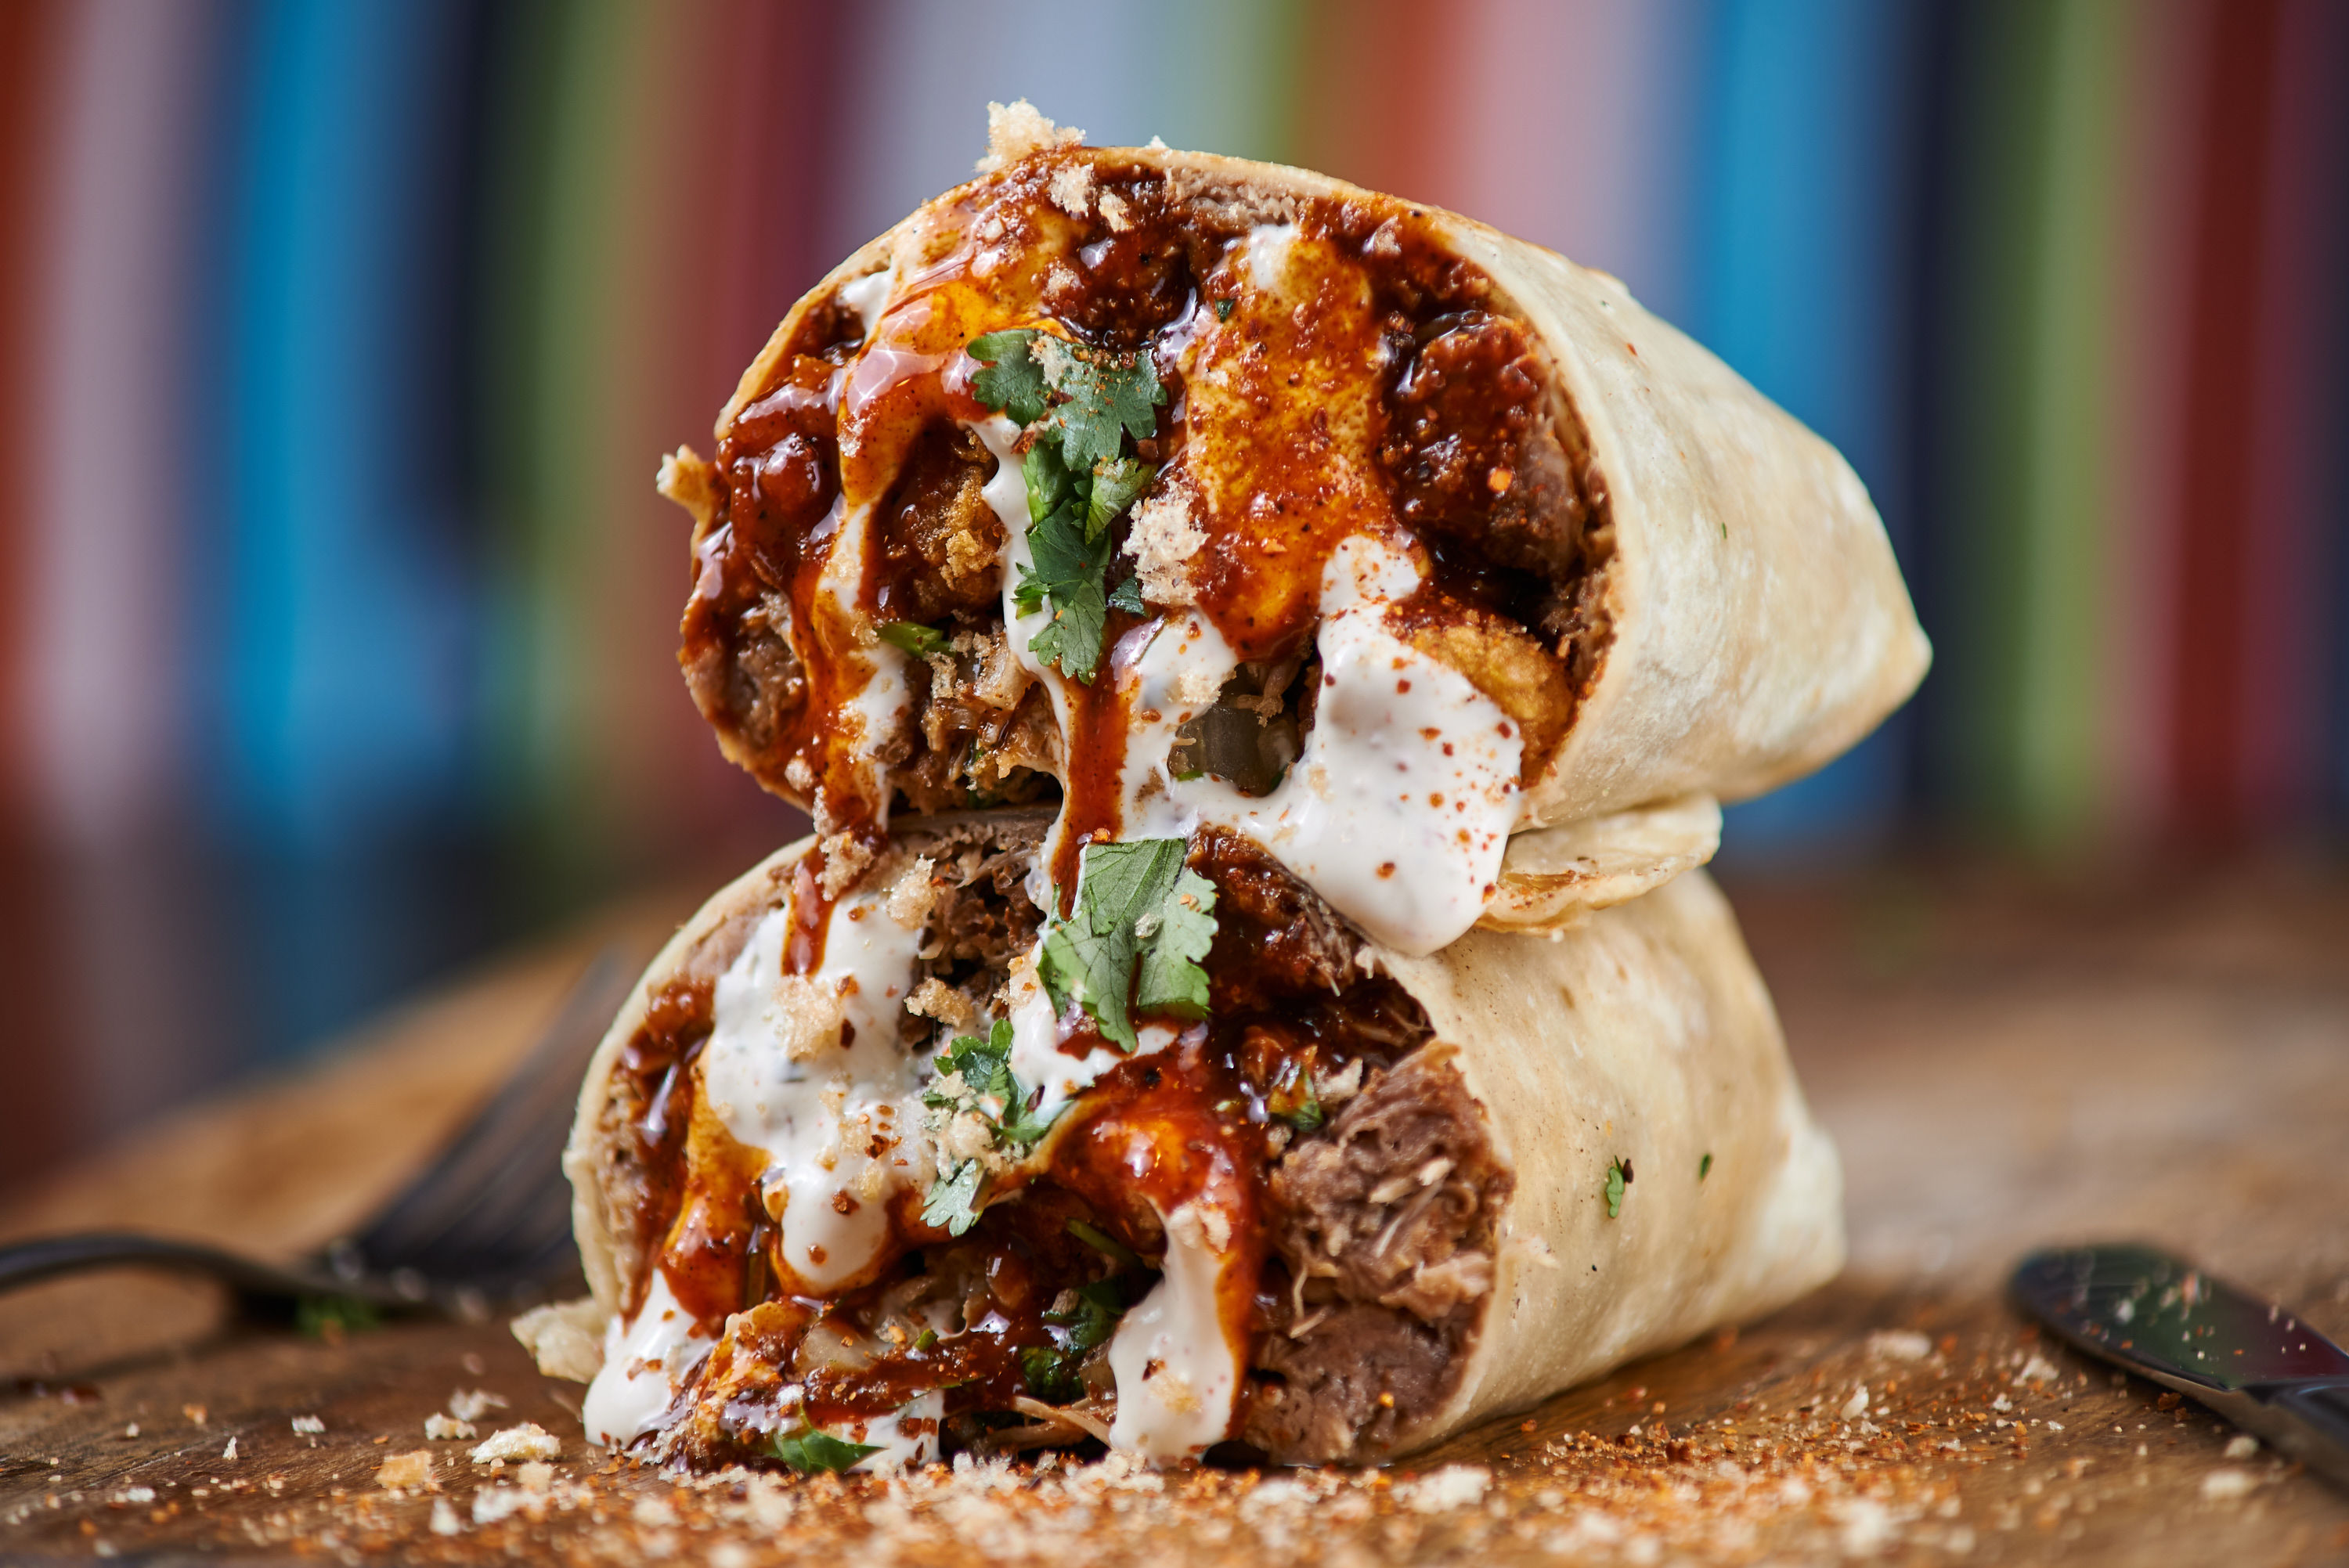 photo credit: Erik Herrera
Lighting
We always recommend shooting with natural lighting. Set up near a big window. Natural light creates soft shadows and highlights the colors more easily than an artificial external light setup.
 photo credit: Heather Lemmon
Steaming Food
Your food just came off the grill, and you want to capture the steam sizzling off your dish. First thing first, you need a dark background to capture the steam.You won’t be able to get this effect with a light backdrop. If you don’t capture the steam in time, try setting a small cup of boiling water hidden behind the food to still get that sizzling look.
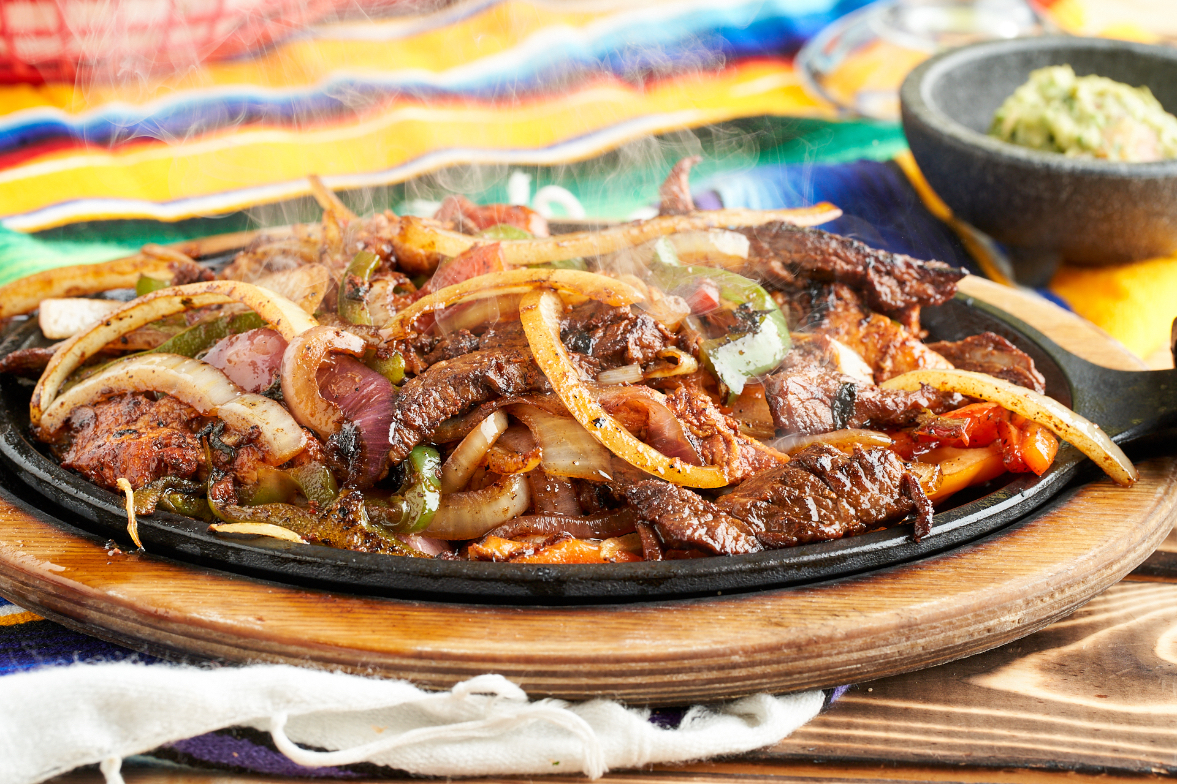 photo credit: Christian Houda
Salads
Add all your ingredients on top of the salad. If you mix it in, we lose perspective of what’s in your salad. We know it’s a salad when we see it, so you shouldn’t worry too much about tossing it to make it look more like…well, a salad.
Cocktails
You don’t have to use alcohol in some of your cocktail shots! Replace liquor like gin or vodka with water and you should still get the same effect. Toss the glassware into a freezer for about 5 minutes before shooting, and you’ll get condensation creating a refreshing look for the beverage!
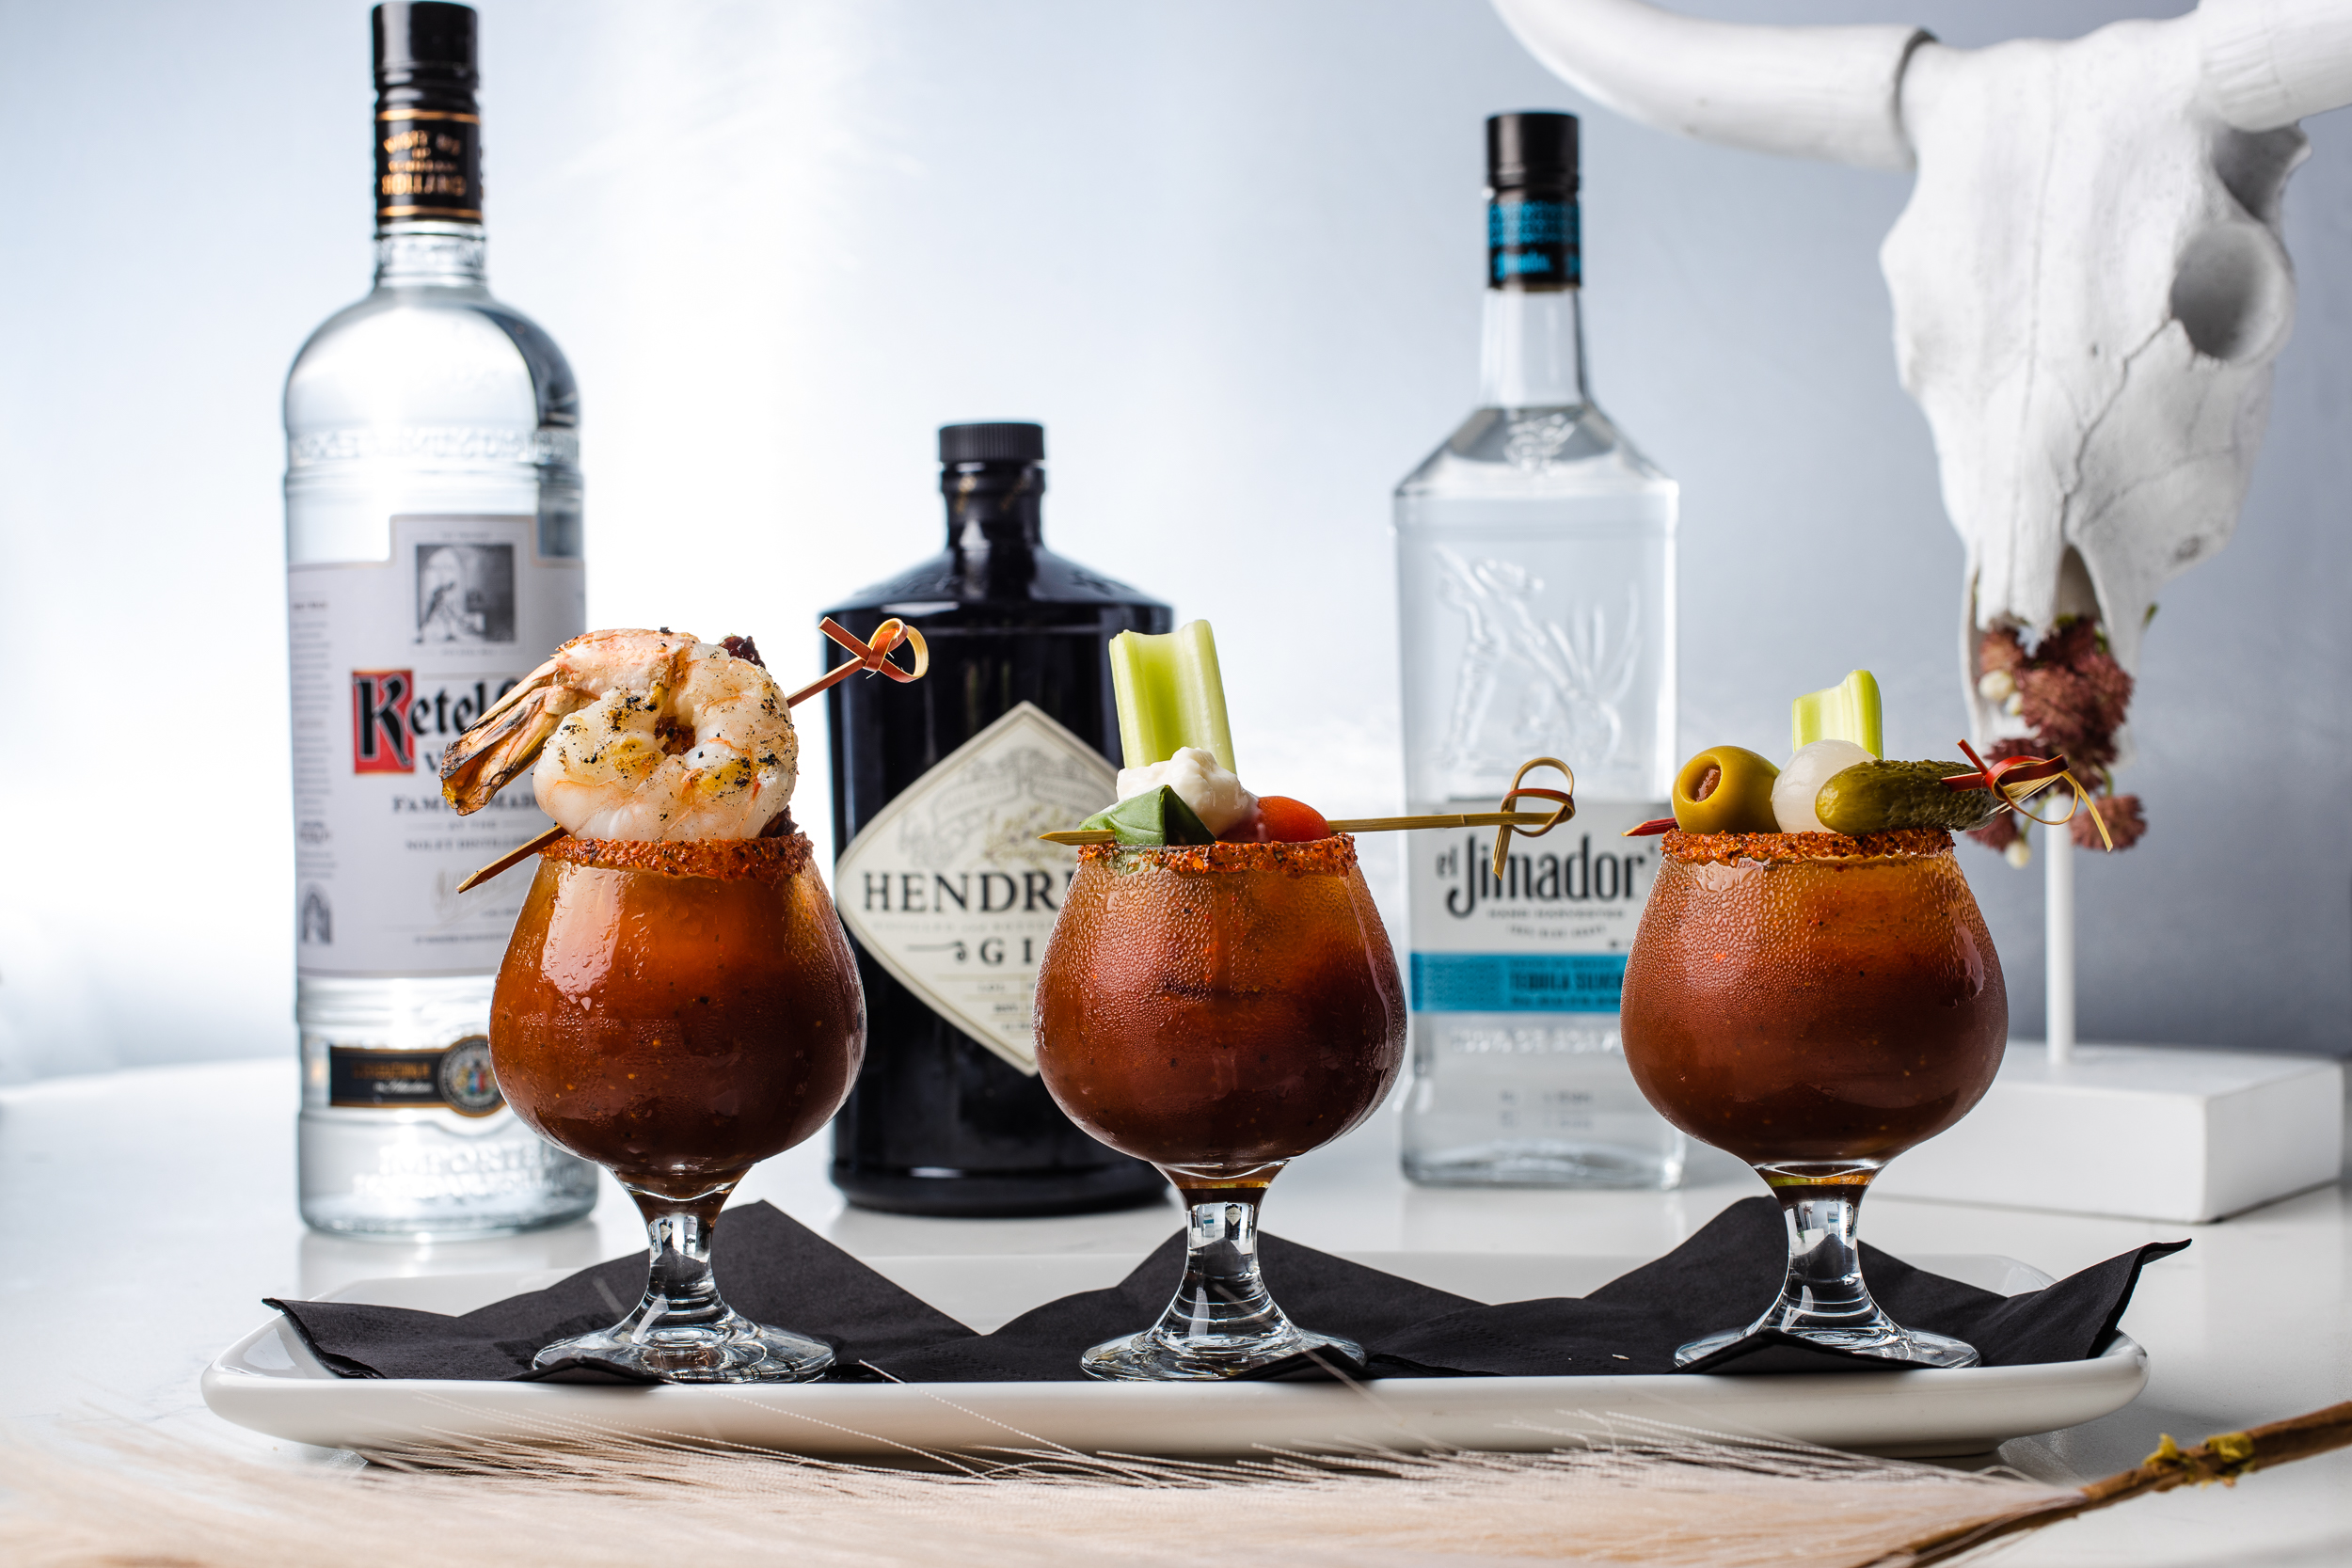 photo credit: John Doukas
Ice Cream
As with anything that melts, make sure your set is finished before adding. We don’t want it to start to drip and melt before we’re ready to even start shooting! Keep it fresh by scooping it onto parchment paper kept in the freezer. Take out one scoop at a time to shoot, and your ice cream will stay frozen on set.
 photo credit: Nicole Reusser
Remember, people eat with their eyes first. Your food helps tell your restaurant story and it’s part of what keeps guests coming back again and again!